
Finding items to make for fall crafts is easy and it's fun! I have a whole dresser full of items that I have saved just for crafts with the kids including leftover tissue paper, milk jugs, lids, pipe cleaners, paint and much more. The dollar store is an inexpensive way to load up on fun supplies at a great price.
Don't forget to make a few fun snack using Candy Corn! Our Candy Corn Fun ebook is full of 17 creative ways to use autumn's favorite candy including Monster Cupcakes, Candy Corn Bark and more!
Candy Corn Craft Supplies
You might be able to find these supplies in your home but if not here is a list of what we used:
- 8×10 sheet of black card stock
- yellow, orange and white tissue paper
- 8×10 sheet of white paper
- marker
- glue
- White craft paint or an Oil-Based Paint Marker
- glitter
- old picture frame (you can find these very cheap at a second-hand store or dollar store)
- paint brush
- scissors
Candy Corn Craft Instructions
1. Draw a piece of candy corn onto the white paper. I did this while my kids went onto step 2 and started ripping up the construction paper. I just free-handed the drawing but you can always find a printable online to print off and use.

2. Start ripping up the tissue paper. This is the fun part, normally kids aren't allowed to rip things up so let them just go at it!! We had a blast with this part, I never knew how much kids like to rip things apart!! While we were ripping we were throwing the small pieces up in the air so by the time we got done we had quite the mess on our hands but the kids had a ball and we just picked them up when we were done and put them in the bowls to use as their craft. I would suggest only doing one color at a time or you are going to end up sorting out the pieces and that may take a while. 😉

3. Take glue and put it on the top part of the candy corn (we spread ours around with a paintbrush) and start sprinkling on the white tissue paper. We tapped it down and little onto the glue to make sure it stuck to it and didn't start falling off. Don't worry about making it stay inside the lines of the candy corn because you will be cutting it out once it dries and it looks just fine. Continue with the remaining colors.

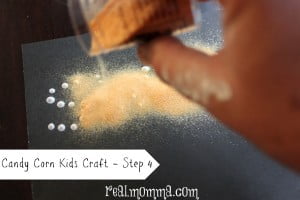
4. Set your candy corn to the side and let the glue dry. Meanwhile, take your black 8×10 piece of cardstock (you can use construction paper or scrapbook paper if that is what you have on hand). I used the end of the paintbrush to spell out the word sweet at the top of the black paper with white paint. I dipped the end of the paintbrush without the bristles into the paint and began making dots to spell the word sweet at the top of the black paper. I did have orange glitter on hand so while the paint was still wet I sprinkled glitter on it to give it a sparkly look.
5. Set this aside to dry. This is a good time to have a snack or take a fall walk and talk about the falling leaves and how the weather is getting cooler. If you don't mind your children having sweets you could take off on your walk with a hand full of candy corn to sweeten the deal.
6. Once the glue has dried on the candy corn sheet and your paint has dried on your cardstock it is time to put this fabulous piece of artwork together. You will want to cut out the candy corn first and glue it to your sheet of cardstock and then place it into the black frame.
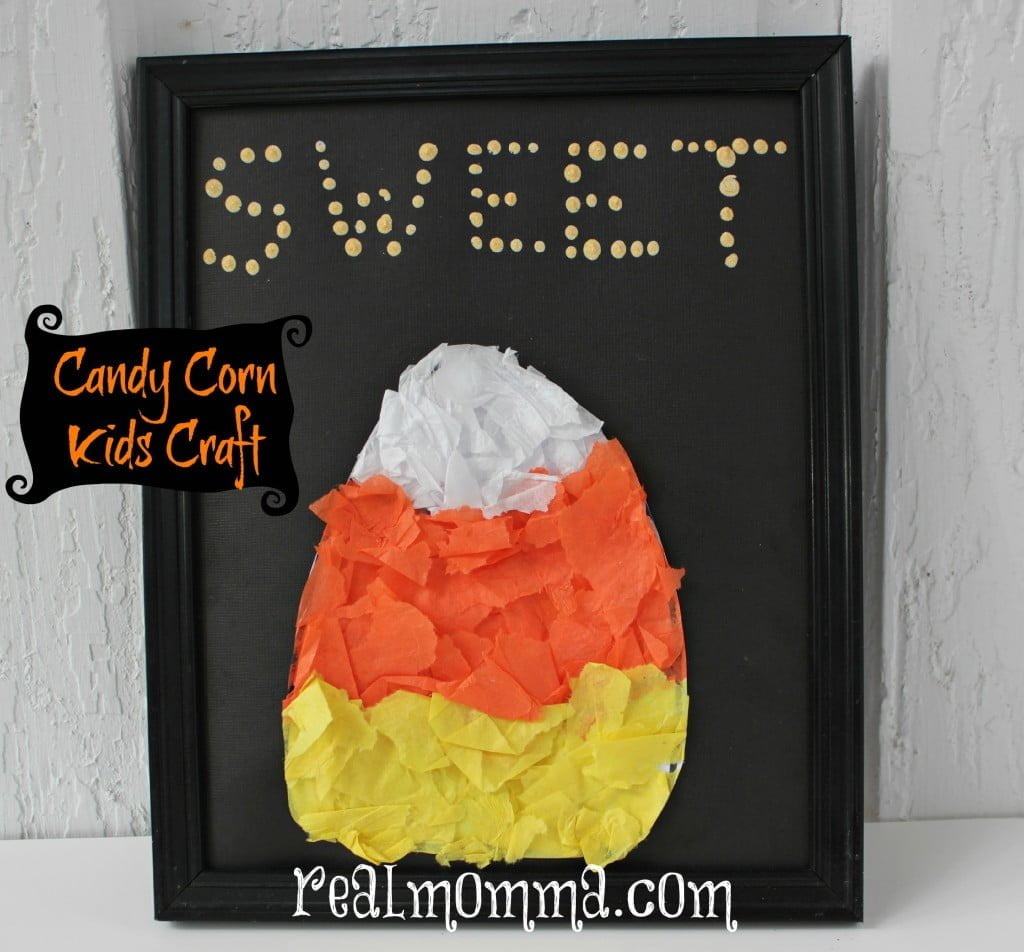
Have fun completing this project with your little ones!
For more great fall crafting projects check out our post ==> 5 Fun and Easy Fall Crafts
More Candy Corn fun? Check out our ebook: Candy Corn Fun