Close Menu
    Facebook X (Twitter) Instagram
    Facebook X (Twitter) Instagram Pinterest YouTube RSS
    Real Momma
    • Entertainment
      1. Wine
      2. Movies
      3. Books
      4. Sports
      5. Fashion
      Featured

      Discover Summer Adventures in the Midwest: Family Fun on a Budget

      0
      Recent

      Why Ear Piercers Recommend Titanium as the New Safe Standard

      0

      Ridesharing Safety Gaps Exposed by Lyft Sexual Assault Lawsuits

      0

      Filing an Auto Accident Claim Without a Lawyer Is Riskier Than You Think

      0
    • Travel
      1. Destinations
      2. Hotels
      3. Attractions
      4. Restaurants
      5. Travel Tips
      Featured

      Discover Summer Adventures in the Midwest: Family Fun on a Budget

      0
      Recent

      To Travel or Not to Travel? Deciding Whether to Take Your Baby on a Trip

      0

      Must-Visit Beaches in Scotland

      0

      Eco-Friendly Family Vacations: How to Explore, Learn, and Conserve Together

      0
    • Life
      1. Household Tips
      2. Health
      3. Stay Organized
      4. Recipes
        • Breakfast
        • Instant Pot
        • Beverages
        • Slow Cooker
      5. Money Tips
      6. Giveaways!
      7. Reviews
      Featured

      Sprinkle Some Fun: Sweet Confetti Dip Recipe

      0
      Recent

      Capturing the Beauty of Maternity Photography: Tips and Techniques

      0

      Ridesharing Safety Gaps Exposed by Lyft Sexual Assault Lawsuits

      0

      Most Common Mistakes When Preparing Steak Tartare at Home

      0
    • Parenting
      1. Crafts
      2. Fun with the Kids
      3. Tips and Tricks
      4. Pets
      5. School
      6. Toys
      Featured

      Mother’s Day Gifts for Moms Who Love Their Dogs

      2
      Recent

      The Benefits of Prep School Education: 5 Compelling Reasons to Consider

      0

      Fun Christmas Crafts Younger Children Will Love Making

      0

      How to Make Your Home Safe and Fun for Pets and Kids

      1
    • Guest Posts
    • About me!
      • Work With Me
      • Contact Me!
      • Newsletter
      • Disclosure and Privacy Policy
    • Shop
    0 Shopping Cart
    Real Momma
    Crafts

    Quick and Easy DIY Santa Claus Door Hanger

    By Laura CyraJanuary 5, 20251 Comment4 Mins Read
    Facebook Twitter Pinterest LinkedIn Tumblr Email

    You're going to love this quick and easy DIY Santa Claus Door Hanger!  The kids can easily make it and will have a blast painting, glittering, and gluing all while creating a disaster! What I love about this craft is most of the items you can find in your craft bin or at the dollar store, making this an inexpensive way to craft with the kids!

    Quick and Easy DIY Santa Claus Door Hanger

    Quick and Easy DIY Santa Claus Door Hanger

    With a few supplies you'll be able to create numerous door hangers, maybe even one for each room in the house!  These also make cute add-ons for the kids to slip inside gifts to family and friends.

    Supplies Needed

    Prepare all materials needed in this tutorial, you can find most of these items at your local dollar store:

    • a piece of cereal box
    • a piece of black crafting felt
    • black and white acrylic paint
    • red glitter
    • paint brushes
    • cutter
    • newspaper
    • a pair of scissors
    • a pencil
    • white glue
    • hot glue
    • any round object that is near the size of the door knob
    santa door hanger step 2

    Step 1:  

    Cut a rectangle that is about 22 centimeters in length and 10 centimeters in width from the empty cereal box.  This will be the mainframe of the door hanger.  Trace the masking tape on the upper part of the box.  The orientation of this should be in portrait.  The masking tape is used as a reference to the doorknob size, but any perfect round object would do.

    santa door hanger step 3

    Step 2: 

    Cut the traced circle on the box using a cutter. This is a great job for the big kids to help with.
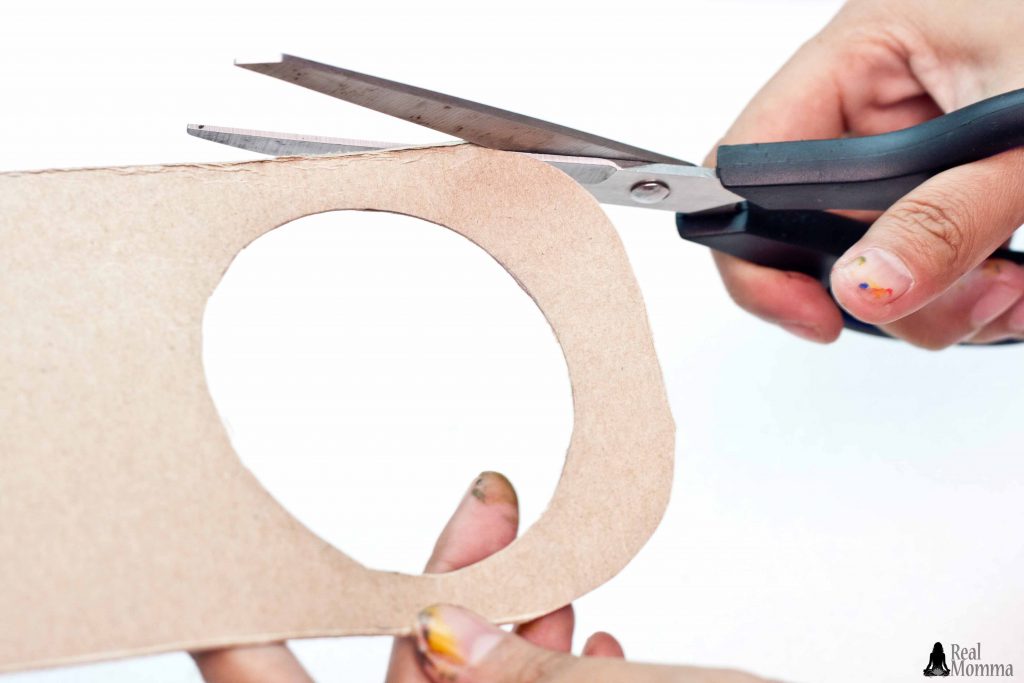
    santa door hanger step 4

    Step 3:

    Curve the outer edges on the topmost part of the door hanger body.  Do this on both edges.

    santa door hanger step 5

    Step 4:

    Generously apply white glue on one side of the door hanger. Don't worry about covering it all we'll do that in the next step.
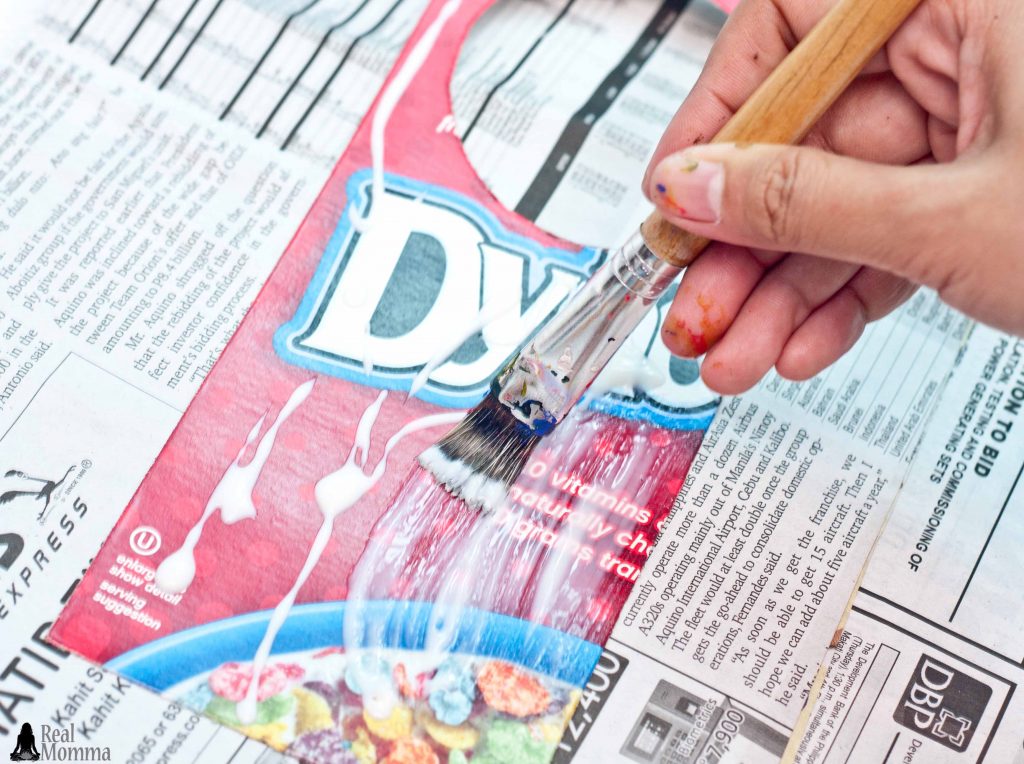
    santa door hanger step 6

    Step 5:

    Evenly brush the white glue on the body of the door hanger. We find an inexpensive paint brush does the trick!

    santa door hanger step 7

    Step 6: 

    Sprinkle the red glitters on the body of the glued door hanger body. This step can be messy so if you have littles you may want to give them a helping hand.
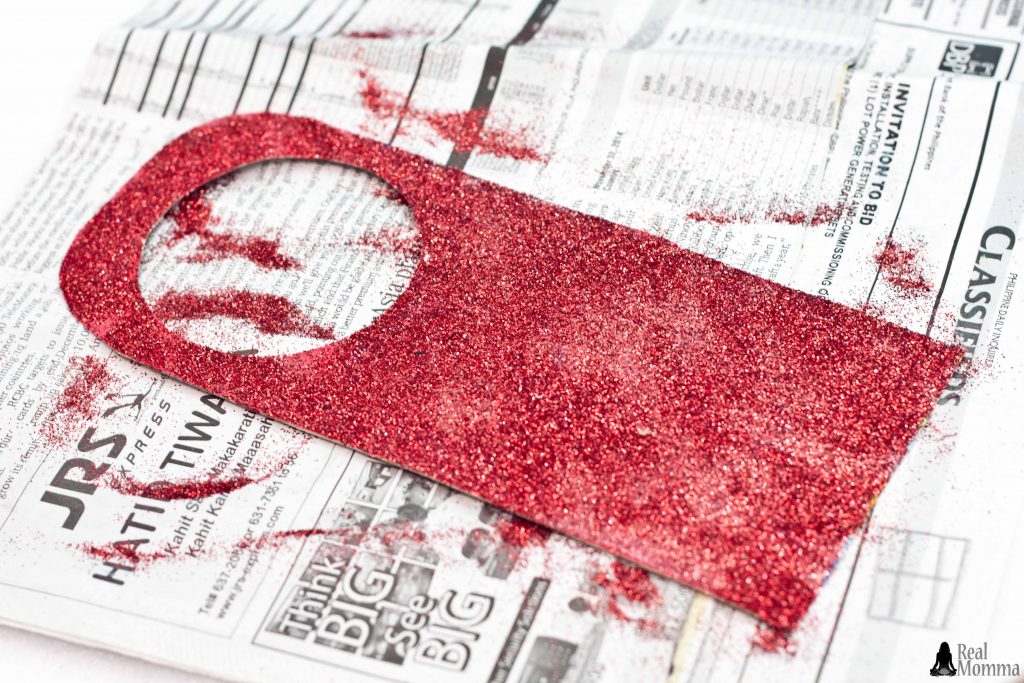
    santa door hanger step 8

    Step 7:

    Let the glue dry and the glitter settle on the body of the door hanger. This will take at least an hour.

    santa door hanger step 9

    Step 8:

    Cut a small strip of black felt.  The width should be at least 2 to 3 centimeters and the length would depend on the width of the door hanger’s body.  This is the belt of Santa.

    santa door hanger step 10

    Step 9: 

    Cut a small square that is quite bigger than the belt.  Cut a smaller square in the middle to create a hole.  This will be the belt’s buckle.

    santa door hanger step 11

    Step 10: 

    Mix white and a little bit of black to create gray acrylic paint.  Paint the buckle with this and let it dry for an hour.

    santa door hanger step 12

    Step 11:

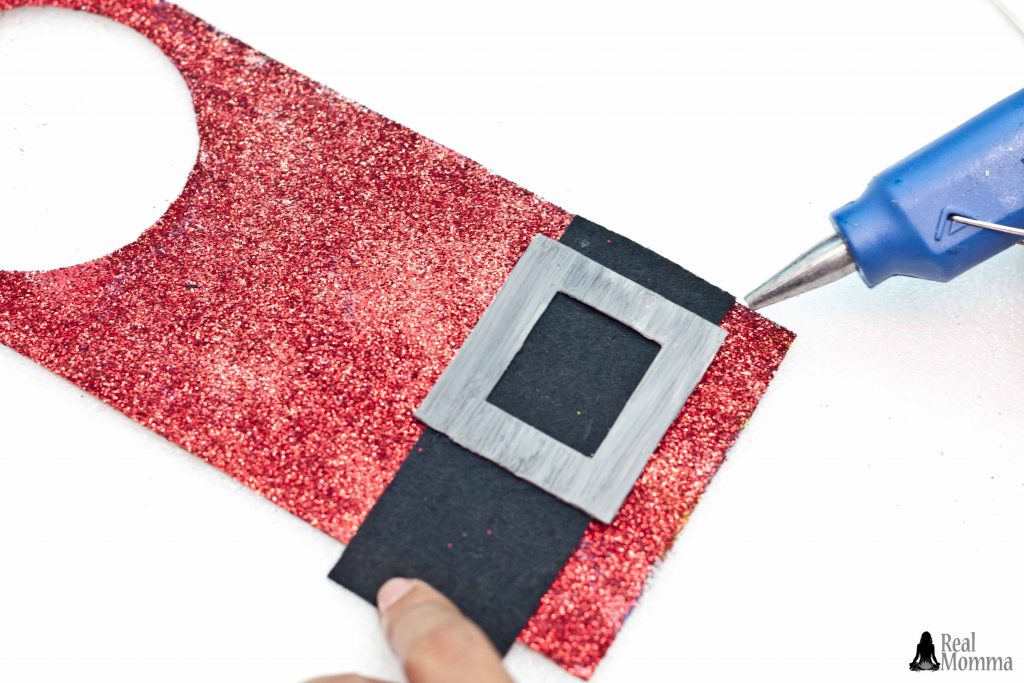
    Hot glue the buckle on the belt.  The buckle should be somewhat one-sided to create an effect later on.

    santa door hanger step 13

    Step 12:

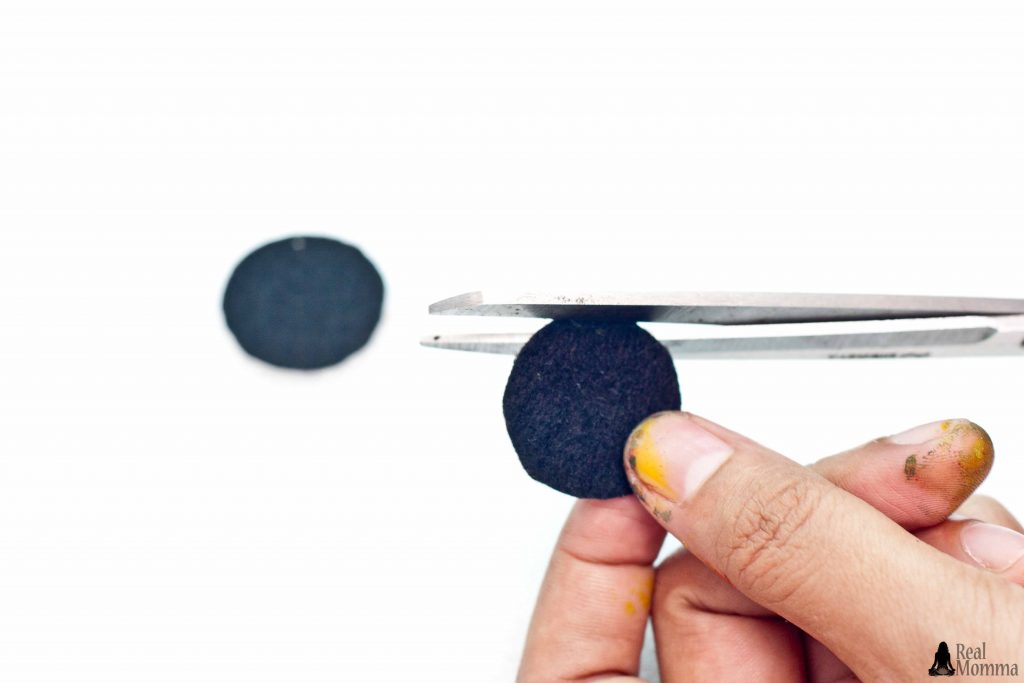
    Cut two pieces of a black circle from the crafting felt.  These will be the buttons of Santa.

    santa door hanger step 14

    Step 13:

    Hot glue the belt with the buckle on the lower thirds of the door hanger’s body.

    santa door hanger step 15

    Step 14:

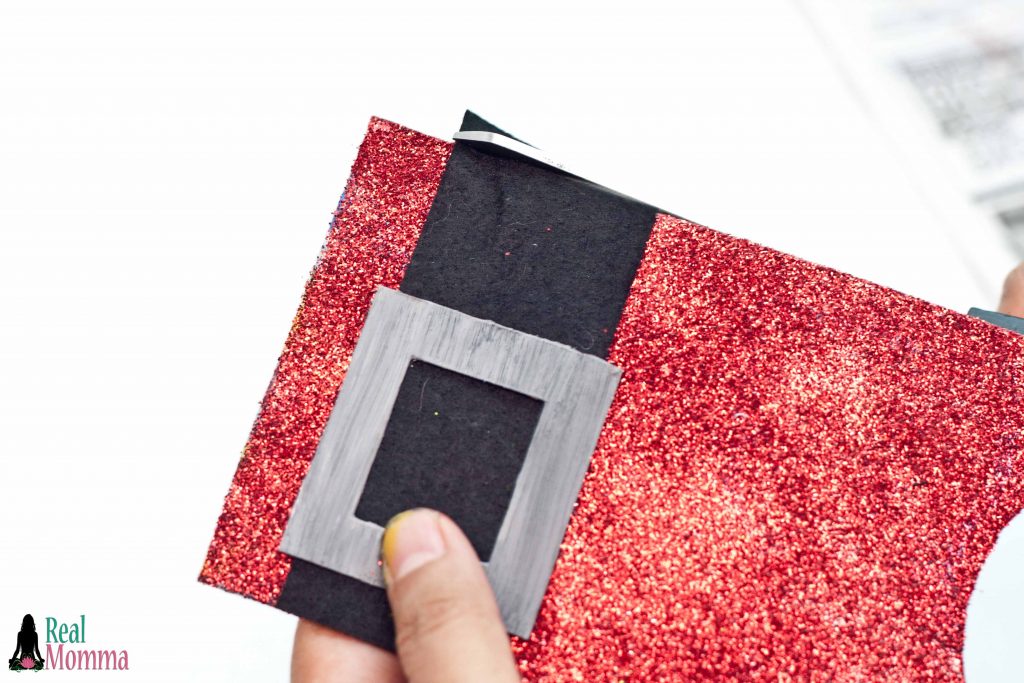
    Cut the excess of the belt. This might be a little tricky for little so make sure they have scissors made for small hands.

    santa door hanger step 16

    Step 15:

    Hot glue the buttons on top of the belt.  This should be aligned with the buckle of the belt.

    santa door hanger step 17

    Step 16:

    Try the door hanger on and make the necessary adjustments.
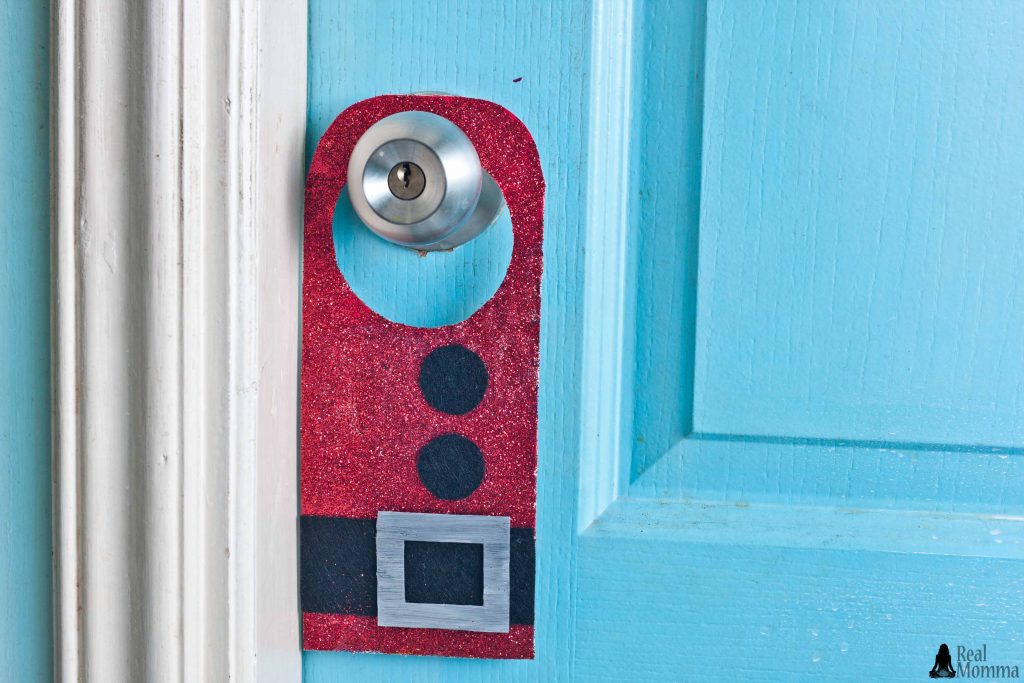
    santa door hanger step 18

    Step 17:

    Done and ready to use!  You can now hang your cool and simple Santa Claus door hanger to celebrate the season!

    This quick and easy DIY Santa Claus door hanger is the perfect craft to make with the kids!  They love making a couple extra and sticking them in gifts we're giving to friends and family during the holidays.  It is a simple way to decorate the door and spread a little Christmas cheer.

    What's your favorite Santa craft?

    Quick and Easy DIY Santa Claus Door Hanger
    Previous ArticleMattel Holiday List Toppers Giveaway
    Next Article DIY Upcycled Snowman Craft

    Related Posts

    Fun Christmas Crafts Younger Children Will Love Making

    October 25, 2024

    5 Crafting Hobbies Perfect for Your Pre-Teen

    May 1, 2024

    7 Affordable Craft Ideas for Children

    April 25, 2024

    1 Comment

    1. Mirela on December 8, 2015 10:34 am

      Very amazing play, because all the more and more is at home of cardboard boxes after food things. and such fun with kids which they can sprinkle door hanger with brocade it is a bit of a lark:)

      Reply
    Leave A Reply Cancel Reply
    Recipe Rating


    CommentLuv badgeShow more posts

    Products
    • A to Z Printable Coloring Pages A to Z Printable Coloring Pages $4.95
    Must Try Recipes
    Cocktails

    Blueberry Moscow Mule Recipe: A Delicious Twist on a Classic

    0

    This blueberry Moscow mule recipe is the perfect fruity twist on a classic cocktail. It’s simple to make, refreshing, and delicious!

    Dark Cherry and Mint Fizz

    0

    Best Summer Drink: Watermelon Mint Mojito

    0

    Quick and Easy Hot Beer Cheese Dip

    0

    Jalapeno Cucumber Lemonade Recipe

    0
    Categories
    © REAL MOMMA 2025. Theme by ThemeSphere

    Type above and press Enter to search. Press Esc to cancel.